Geography: This article is applicable for ANZ Transactive - Global customers banking in Taiwan.
Full details are available in Features by Geography.
Full details are available in Features by Geography.
Payment file upload option using ANZ Transactive Cash Asia file format guides is available through the ANZ Fileactive Portal.
About IBRS Payments
What is an IBRS Payment?
Interbank Real-Time Gross Settlement (IBRS) payment allows you to transfer funds from your Taiwan domiciled TWD account registered to ANZ Transactive - Global, to a beneficiary's Taiwan domiciled TWD account. This payment type also allows you to create Payroll (Salary) payments.For more information, please refer to Asia & Pacific Payment Types.
Payment Method Rules for IBRS Payments
- Value date will default with the current or next business date if the payment is created on a non-business date. If today's payment misses the cut-off time, your payment will remain in a processing status until it is processed on the next business date.
- Non-business day - ANZ Transactive – Global will not allow you to create a payment where the Value Date is a non-business day (e.g., weekend, public holiday, bank holiday) or a currency holiday
- Payment currency is TWD only
- Maximum payment value is $99,999,999,999
Who can create a Domestic Payment?
- Eligible users with Initiator and account access can create and manage an IBRS payment based on your organisation's predetermined user permissions and payment settings. These role permissions can include:
- Initiator
- Initiate/Authorise
- Full Access
- Only users who are entitled to Payroll Payments will be able to view, edit and approve payments when the Payroll indicator selected.
Payment input screens
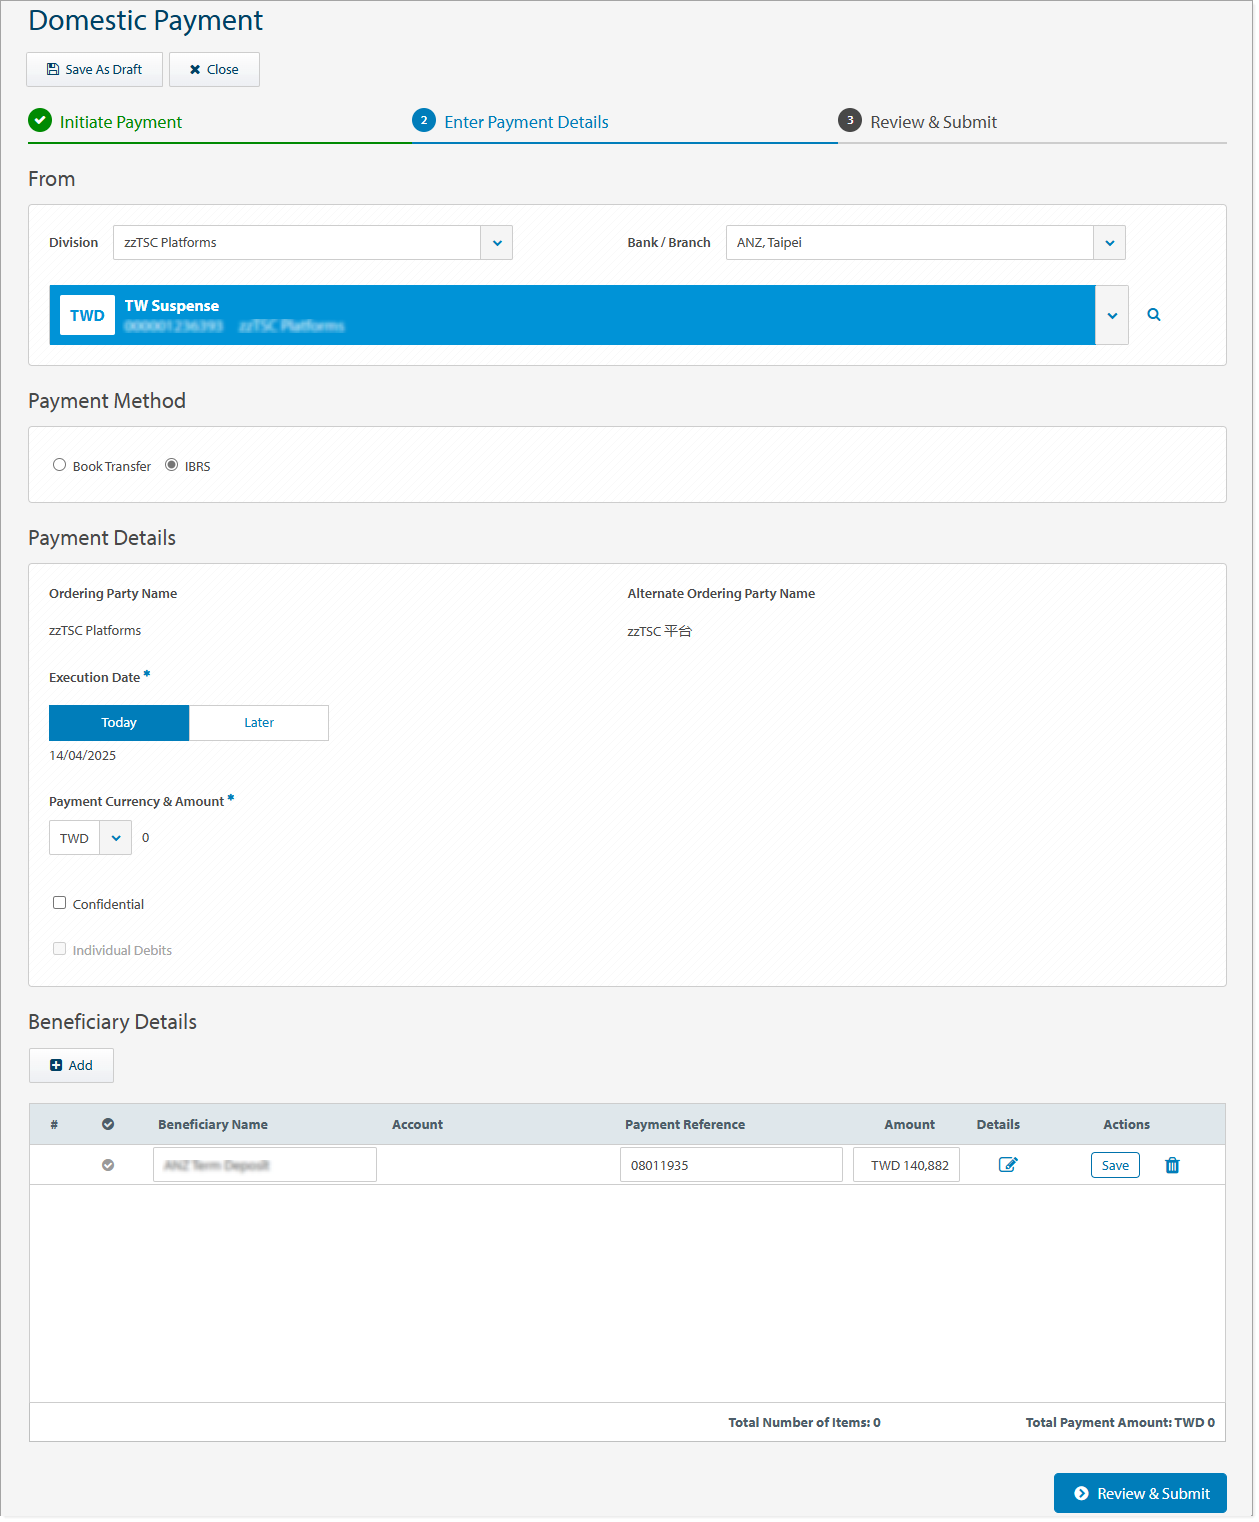
Domestic Payment screen
The following image is an example of a domestic payment screen with fields including the division, debit account, payment method, execution date, and beneficiary details.
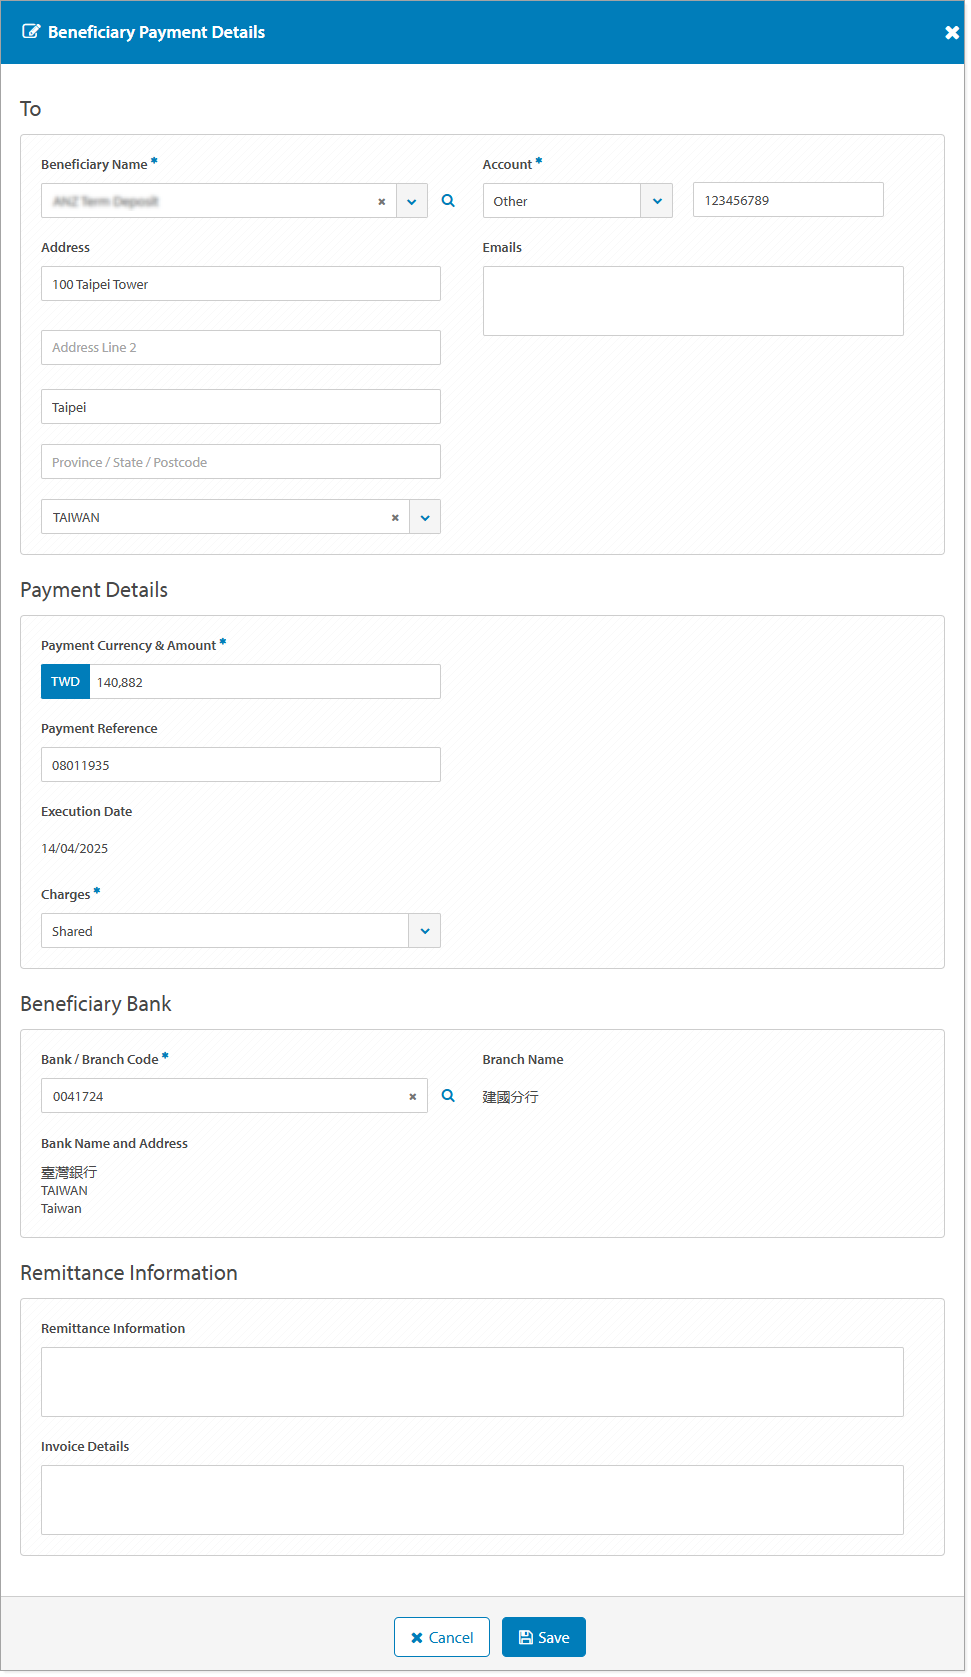
Beneficiary Payment Details screen
The following image is an example of a Beneficiary Payment Details screen with fields including the beneficiary's name, address and account details, beneficiary bank details, payment reference, remittance information and invoice details.
Beneficiary Details screen
The following image is an example of the Beneficiary Details screen with fields including the beneficiary's name, address, account and beneficiary email address.

Create IBRS Payment video
Coming soon.
Create an IBRS Payment
There are multiple ways you can create a domestic payment using the IBRS payment method from the Asia & Pacific Payments menu. Choose from the following options:
- Click Create Payment > Domestic Payment (see step-by-step instructions below)
- Click Create Payment > Use Payment Template
- Click Create Payment > Use Payment File using Asia & Pacific File Format Guides
- Click Create Payment > Use Existing Payment
- Click Approve Payments > New > Domestic Payment (see step-by-step instructions below)
- Click Current Payments > New > Domestic Payment (see step-by-step instructions below)
To create an IBRS payment and manually enter the payment instructions, follow the steps below:
| STEP | ACTION | ||||||||||||||||||||||||
|---|---|---|---|---|---|---|---|---|---|---|---|---|---|---|---|---|---|---|---|---|---|---|---|---|---|
| 1 | Click Asia & Pacific Payments > Create Payment menu or Click Asia & Pacific Payments > Current Payments menu > New or Click Asia & Pacific Payments > Approve Payments menu > New. |
||||||||||||||||||||||||
| 2 | Click Domestic Payment. | ||||||||||||||||||||||||
| 3 | If required, select the Division the payment will be made from. If you are entitled to more than one division, you can set a default division for future payments. The Bank/Branch field will prepopulate from the Division selected. |
||||||||||||||||||||||||
| 4 | Select a TWD Debit Account. | ||||||||||||||||||||||||
| 5 | Select IBRS Payment Method The Ordering Party Name and Alternative Ordering Party Name will prepopulate based on the debit account selected. |
||||||||||||||||||||||||
| 6 |
Execution Date defaults with the current business date. If required, click Later to choose a future value date. |
||||||||||||||||||||||||
| 7 | If required, select Payroll for confidential salary payments and to restrict access to view, edit and approve the payment. | ||||||||||||||||||||||||
| 8 | If required, select the Individual Debits indicator to generate a separate debit entry on your account for each individual beneficiary payment instruction. | ||||||||||||||||||||||||
| 9 |
To reduce the risk of fraud, ANZ recommends you always confirm beneficiary details when processing a payment.
Click Add to add one or more beneficiary details using the following options:
Add Beneficiary from your Beneficiaries list
Search and select the Beneficiary from the Beneficiary Name field, then proceed to next steps. If required, click Add again to add additional beneficiaries.
Add New Beneficiary
Users must have entitlements to create new beneficiaries to complete these steps.
Currently, new beneficiaries cannot be saved to your Beneficiaries menu.
|
||||||||||||||||||||||||
| 10 | If required, enter Payment Reference up to 20 characters. | ||||||||||||||||||||||||
| 11 | Enter the Beneficiary payment Amount. | ||||||||||||||||||||||||
| 12 | If required, click Beneficiary Payment Details icon to view and update additional beneficiary information:
Add or update Beneficiary Payment Details
|
||||||||||||||||||||||||
| 13 | If required, repeat above steps to add each beneficiary. | ||||||||||||||||||||||||
| 14 | Click Review & Submit. | ||||||||||||||||||||||||
| 15 | Click Submit. |
Errors and Alerts
Error and alert messages such as 'fields validations' display information about the impacted field(s) and highlights the field(s) in red. Error messages are specific to the payment method types, fields available and particulars validations. You can update the information within the impacted field(s) and continue processing the payment.
Mandatory field validations:
Next Steps
When the payment has been successfully submitted and is now in a Pending Approval status, you can choose from the following on-screen options:
- Review this Payment from the Payment Details screen
- View Approve Payments from the Approve Payments screen
- Save Payment as Template to your Templates screen
- Create a New Payment
- Click OK to return to the Create Payment screen
When the payment has been successfully submitted for approval(s), the next steps can be:
- Approve Payment for processing or,
- Manage Payment for copying, editing, repairing or deleting
Video Transcript
Coming soon.