Geography: This article is applicable for ANZ Transactive - Global customers banking in Australia.
Full details are available in Features by Geography.
Full details are available in Features by Geography.
About RTGS Templates
What is an RTGS template
Real Time Gross Settlement (RTGS) template allows you to setup frequently used payment instructions to transfer funds from your Australia domiciled AUD account registered to ANZ Transactive - Global, to a beneficiary's Australia domiciled AUD account.Once successfully created, you can use the preconfigured template to create your payment instructions.
Payment template rules for RTGS payments
- Disable Beneficiary changes prevent users from adding or editing any beneficiaries when a payment is created from a template. If your organisation has enabled this product setting in Division Settings, then this indicator cannot be removed.
- Fields marked with an asterisk (*) within a template are considered mandatory. Additional information can be added at time of payment, including value date, additional information, etc.
- Confidential indicator will be enabled for selection for users with Confidential Payments entitlements.
- Template Approvals are required if your organisation needs Approval for templates when creating, editing or deleting a template. Once approved, the template can be used to create a payment.
- New Beneficiaries added to a template may need to be approved before the template can be used to create a payment.
Who can create an RTGS template?
- Eligible users with Payment Management role permissions and account access can create and manage an RTGS template based on your organisation's predetermined user permissions and payment settings. These role permissions can include:
- Manage Payments - Adhoc (Adhoc & Approved Beneficiaries)
- Manage Payments - Approved Beneficiary / Templates
- Manage Payments - Import Payments
- Only users who are entitled to the Confidential Data Group will be able to view and action payments when the Confidential Data Group option is selected.
For more information, please refer to Role Permissions and User Permissions.
Payment template input screens
Domestic payment template screen
The following image is an example of a domestic payment screen with fields including the division, debit account, payment method, template name and description, and beneficiary details.
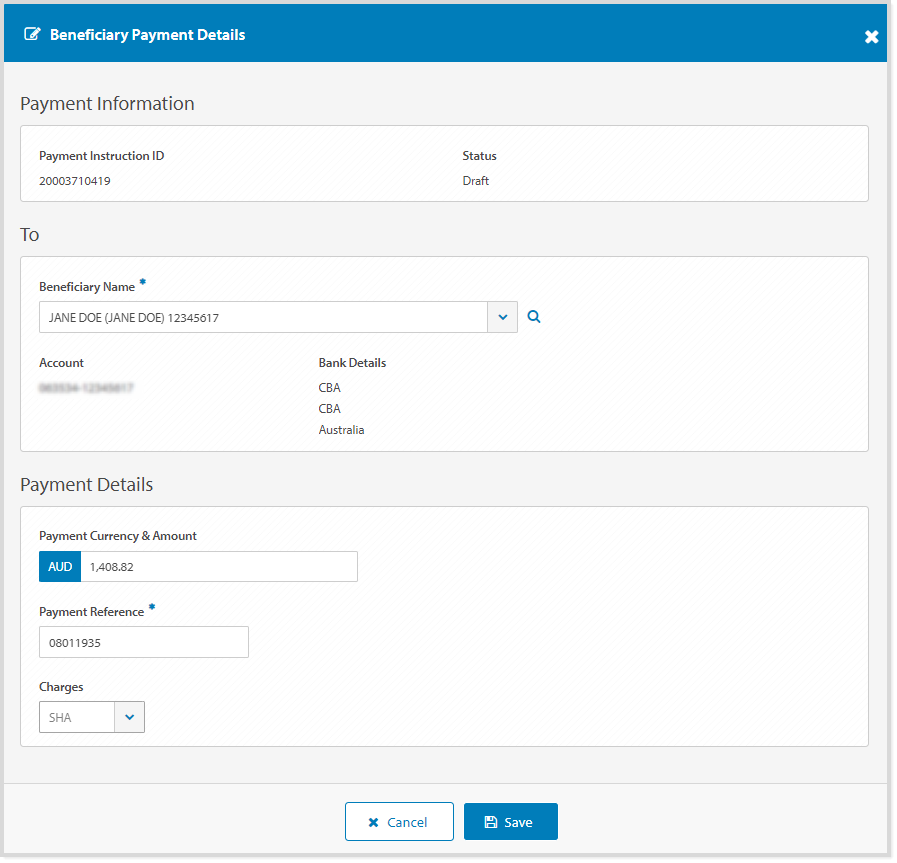
Beneficiary Payment Details screen
The following image is an example of a Beneficiary Payment Details screen with fields including the beneficiary's name, address and account details, beneficiary bank details, and payment reference.
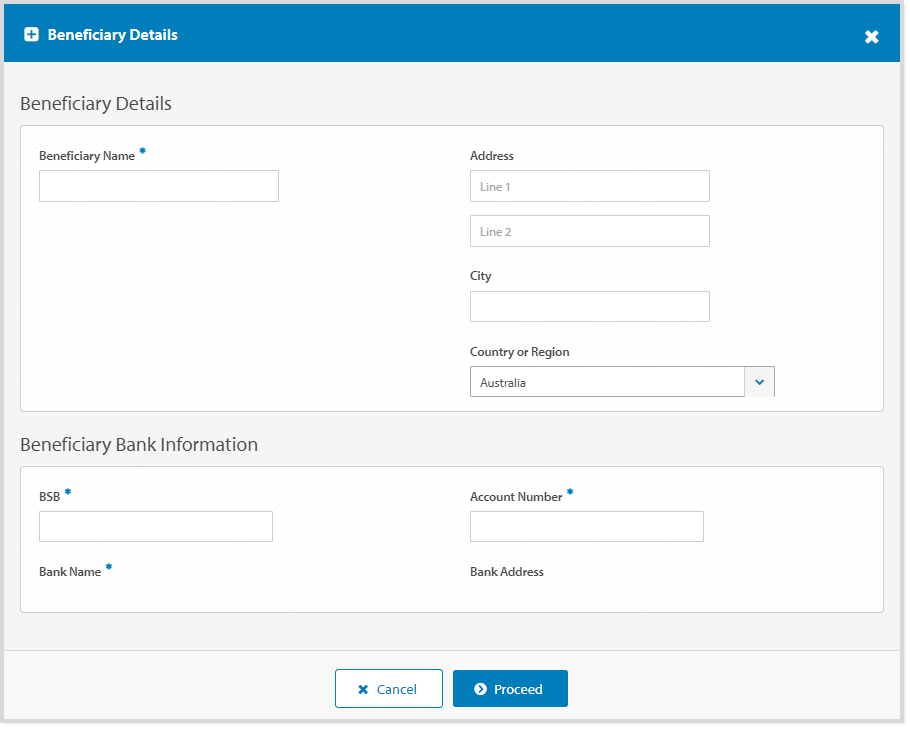
Beneficiary Details screen
The following image is an example of the Beneficiary Details screen with fields including the beneficiary bank details, beneficiary's name and beneficiary email address.
Create RTGS template
To create a domestic payment template, follow the steps below:
| STEP | ACTION | ||||||||||||||||||||||||||
| 1 | Click Payments > Templates menu. | ||||||||||||||||||||||||||
| 2 | Click New on the Control Bar. | ||||||||||||||||||||||||||
| 3 | If required, choose a Country or Region where the funding account is domiciled. Select either:
|
||||||||||||||||||||||||||
| 4 | Click Domestic Payment Template. | ||||||||||||||||||||||||||
| 5 | If required, select the Division the payment will be made from. If you are entitled to more than one division, you can set a default division for future payments. |
||||||||||||||||||||||||||
| 6 | Select the Debit Account. | ||||||||||||||||||||||||||
| 7 | Select RTGS Payment Method. | ||||||||||||||||||||||||||
| 8 | Enter a Template Name up to 16 characters. This will become the Template Name when you create a payment from the template. | ||||||||||||||||||||||||||
| 9 | Enter Template Description up to 40 characters. | ||||||||||||||||||||||||||
| 10 | Enter a Payment Reference up to 16 characters that will appear within the narrative on the funding account, and payment reports. | ||||||||||||||||||||||||||
| 11 | If required, select a Confidential Data Group. | ||||||||||||||||||||||||||
| 12 | If required, untick the Disable Beneficiary changes for Payments created from this Template indicator to allow beneficiaries to be added or edited. | ||||||||||||||||||||||||||
| 13 |
To reduce the risk of fraud, ANZ recommends you always confirm beneficiary details when processing a payment.
Control Bar
Click Add to add one or more beneficiary details using the following options: Add Beneficiary from your Beneficiaries list
Search and select the Beneficiary from the Beneficiary Name field, then proceed to next steps. If required, click Add again to add additional beneficiaries.
Add New Beneficiary
Users must have entitlements to create new beneficiaries to complete these steps.
|
||||||||||||||||||||||||||
| 14 | If required, enter Client Reference up to 16 characters if different from the Payment Reference prepopulated. | ||||||||||||||||||||||||||
| 15 | If required, enter the Beneficiary payment amount. This can be added or updated at time of payment. |
||||||||||||||||||||||||||
| 16 | If required, click Beneficiary Payment Details icon to view or update additional beneficiary information:
Add or update Beneficiary Payment Details
|
||||||||||||||||||||||||||
| 17 | Do you wish to continue the payment at a later stage?
|
||||||||||||||||||||||||||
| 18 | Click Review & Submit. | ||||||||||||||||||||||||||
| 19 | Click Submit.
RESULT: Payment has been submitted and pending approval.
|
Errors and Alerts
Error and alert messages such as 'fields validations' display information about the impacted field(s) and highlights the field(s) in red. Error messages are specific to the payment method types, fields available and particulars validations. You can update the information within the impacted field(s) and continue processing the payment.
Mandatory field validations:
Beneficiary alert notifications:
- Error is indicated by a red triangle. Details must be corrected to proceed with payment processing.
- Alert with Warning is indicated by an amber triangle. Details can be corrected or accepted to proceed with payment processing.
Errors and Alerts within the Beneficiary Payment Details screen:
- Error is indicated by a red triangle. Details must be corrected to proceed with payment processing
- Alert with Warning is indicated by an amber triangle. Details can be corrected or accepted to proceed with payment processing
Next Steps
When the payment template has been successfully submitted for approval and is in a Pending Approval status, the next steps can be:
- Approve Payment Template or,
- Reject Payment Template back to the initiator for editing or deleting.
When the payment template has been successfully approved and is in an Approved status, the next steps can be:
- Create payment from template
- Manage payment templates to copy, delete, edit, recall or view.