Geography: This article is applicable for ANZ Transactive – Global customers banking in Australia, Hong Kong, India, New Zealand, the Philippines, Singapore and Vietnam.
Full details are available in Features by Geography.
Full details are available in Features by Geography.
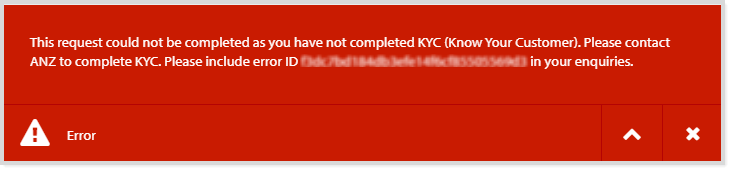
Company Administrators must complete Know Your Customer (KYC) requirements for each geography you operate in, and log in with a security device to perform administration tasks. Please note that this requirement does not apply to the Copy and Reject functions.
About managing custom roles
Custom roles in ANZ Transactive – Global are created by ANZ or Company Administrators. Company Administrators can approve, copy, delete, edit and reject these custom roles. Managing custom roles depends on your user entitlements and completion of Know Your Customer (KYC) requirements for each geography you operate in.
Company Administrators need 2-factor authentication using ANZ Digital Key (ADK) or a physical Token to perform the following actions.
Approve Role
Organisations with dual or triple Administration Models are required to approve or reject actions made to a custom role. Actions that require approval are listed below:
- Creating a custom role
- Modifying a custom role
- Deleting a custom role
| STEP | ACTION | ||||||||
| 1 | Click Administration > Role Management menu. | ||||||||
| 2 | Search and select the role with a pending action to be approved. Use one of the following methods:
|
||||||||
| 3 | Use one of the following methods to approve the role with pending action:
|
||||||||
| 4 | Click Yes in the confirmation pop-up window.
RESULT: The following results will be dependent on the action approved:
|
Copy Role
To copy a custom role, follow the steps below:
| STEP | ACTION | ||||||
| 1 | Click Administration > Role Management menu. | ||||||
| 2 | Search and select the role to be copied. Use one of the following methods:
|
||||||
| 3 | Use one of the following methods to copy the role:
|
||||||
| 4 | Enter a unique Role Name up to 60 alphanumeric characters | ||||||
| 5 | Enter a Role Description up to 200 alphanumeric characters | ||||||
| 6 | Click Submit at the bottom of the screen | ||||||
| 7 | Click OK.
RESULT: The result will be dependent on your organisation's Administration Model:
|
Delete Role
Once a custom role has been deleted, it cannot be reversed. To reinstate the role, a new custom role is required. For more information, please refer to Create Role.
You can delete a role where the following conditions are met:
To delete a custom role, follow the steps below:
- It is not a system role.
- It is not currently assigned to any users.
| STEP | ACTION | ||||||
| 1 | Click Administration > Role Management menu. | ||||||
| 2 | Search and select the role to be deleted. Use one of the following methods:
|
||||||
| 3 | Use one of the following methods to delete the role:
|
||||||
| 4 | Click Yes.
RESULT: The result will be dependent on your organisation's Administration Model:
|
Edit Role
System roles cannot be edited.
To edit a custom role, follow the steps below:
| STEP | ACTION | ||||||
| 1 | Click Administration > Role Management menu. | ||||||
| 2 | Search and select the role to be edited. Use one of the following methods:
|
||||||
| 3 | Use one of the following methods to edit the role:
|
||||||
| 4 | Edit the role details or permissions as required. For more information, see Role Permissions. | ||||||
| 5 | Click Save.
RESULT: The result will be dependent on your organisation's Administration Model:
|
Reject Role
Organisations with dual or triple Administration Models are required to approve or reject actions made to a custom role.
To reject a custom role, follow the steps below:
To reject a custom role, follow the steps below:
| STEP | ACTION | ||||||||
| 1 | Click Administration > Role Management menu. | ||||||||
| 2 | Search and select the role to be rejected. Use one of the following methods:
|
||||||||
| 3 | Use one of the following methods to reject the role:
|
||||||||
| 4 | Enter your Rejection comment then click Reject.
RESULT: The following results will be dependent on the action approved:
|
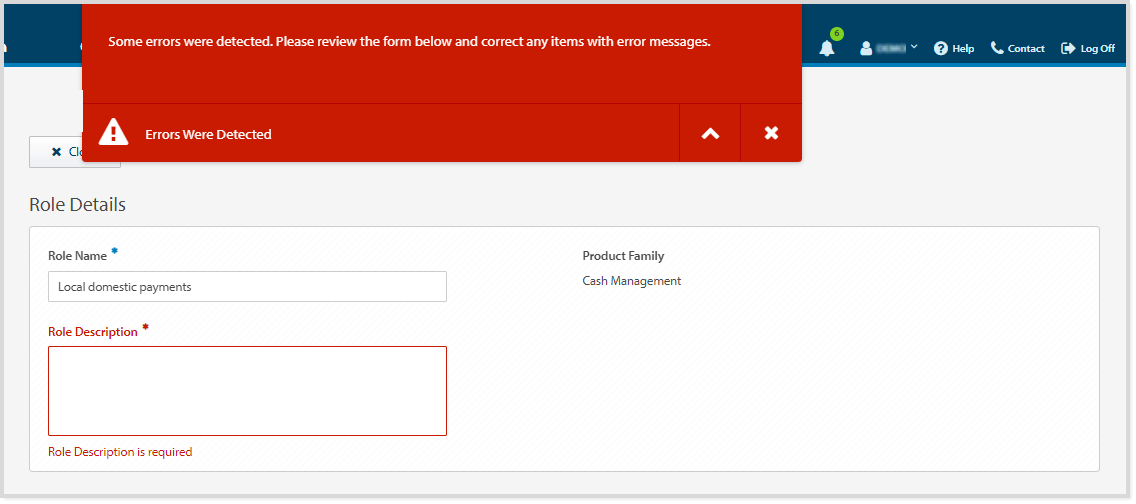
Errors and Alerts
Error and alert messages such as 'fields validations' display information about the impacted field(s) and highlights the field(s) in red. You can update the information within the impacted field(s) and continue processing.